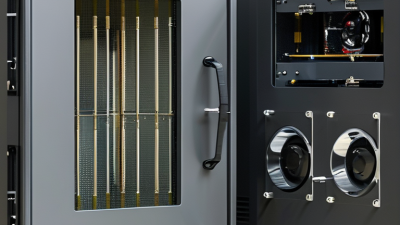
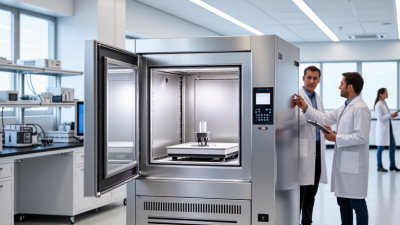
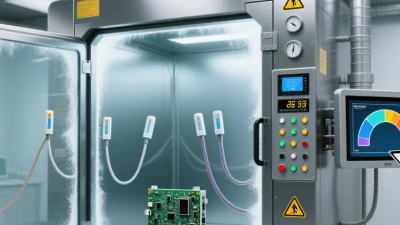
Why Choose a Temperature and Humidity Chamber?
Why choose a temperature and humidity chamber? Because products rarely experience one steady condition in real use. A sealed instrument may warm inside a delivery van, then face cool, damp air indoors. A chamber recreates controlled temperature and humidity changes, helping teams observe how materials and components respond. Small details matter.
The measurement principle behind this work is captured by physicist Lord Kelvin: “When you can measure what you are speaking about, and express it in numbers, you know something about it.” A chamber makes environmental exposure repeatable, but results still depend on good practice. Sensor placement, airflow, specimen loading, and recovery time can all affect readings. A crowded chamber, for example, may produce uneven conditions around test samples.
For product developers and quality teams, this equipment can reveal moisture-related swelling, condensation, corrosion, or changes in electrical performance before products reach customers. It also supports more consistent comparisons between prototypes, materials, and production batches. Yet a chamber cannot predict every field condition. Real environments combine vibration, sunlight, handling, and changing exposure patterns. That limitation deserves attention. Test plans should reflect the product’s intended use, and calibration records should be reviewed rather than assumed current. A well-chosen temperature and humidity chamber is therefore not just a box that heats and cools. It is a controlled tool for asking better questions, gathering traceable evidence, and finding weaknesses while there is still time to respond.
What a Temperature and Humidity Chamber Controls
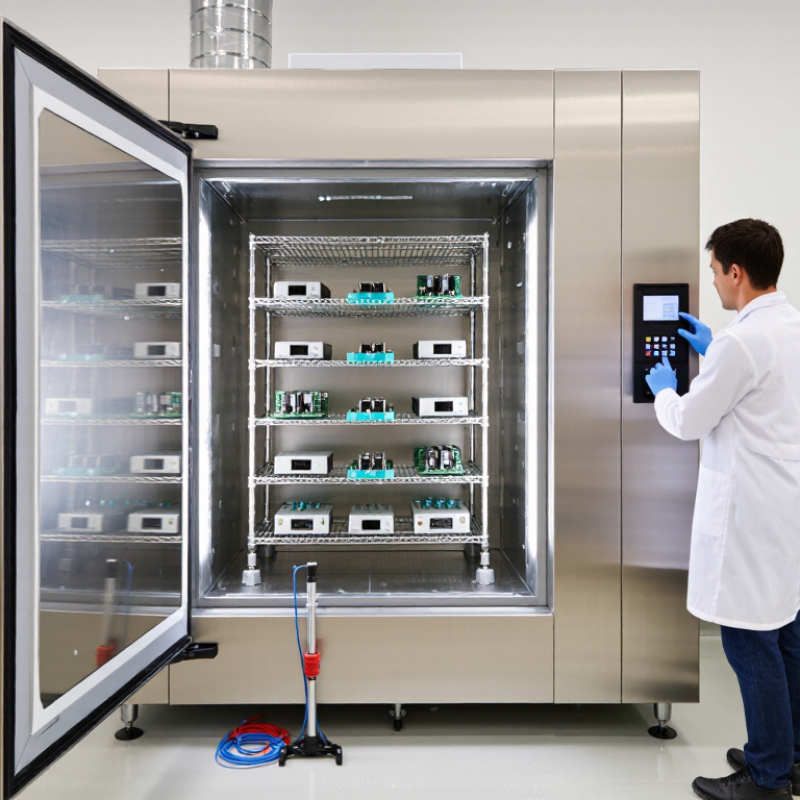
A temperature and humidity chamber controls two conditions that can change how materials perform: heat and moisture in the air. It maintains set points or runs programmed cycles, such as moving from a cool, dry period to a warm, humid one. Small changes matter. A sensor measures conditions inside the chamber, while the control system adjusts heating, cooling, or humidification to stay near the target.
These controls help teams examine changes such as swelling, drying, corrosion, or shifts in electrical performance. Results depend on more than the displayed set point. Airflow, sensor placement, loading, and recovery time after opening the door can affect conditions around a sample. A chamber also cannot reproduce every real-world exposure perfectly. That limitation is worth considering when interpreting test results.
Tips: Match the temperature and humidity range to your test, and allow the chamber to stabilize before loading samples. Keep samples spaced so air can circulate. Record set points, cycle duration, and any deviations. Review the data against the test method; a tidy screen reading alone may not tell the whole story.
How Temperature and Humidity Testing Works
A temperature and humidity test begins with a test plan: the required temperature range, moisture level, ramp rate, and exposure time. A technician places the product and independent sensors inside the chamber. Sensors near the sample help reveal conditions the chamber display may not show. Small differences matter.
The chamber then changes temperature and humidity in controlled steps or cycles. For example, a device might move from cool, dry air to warm, humid conditions, then remain there for several hours. That dwell period lets materials respond. Logged data records what the sample actually experienced, not just the programmed settings. Afterward, technicians inspect for corrosion, swelling, fogging, or changes in performance.
Details can be less tidy than a test schedule suggests. A packed chamber may have uneven airflow, and a sensor beside a warm component can read differently from one near the door. Calibration, sensor placement, and repeat runs help make results more dependable. Condensation deserves attention, too; it can form when a surface cools below the surrounding air’s dew point. A test may expose a weakness, but it does not always explain its cause. That takes careful inspection.
Why Choose a Temperature and Humidity Chamber? - How Temperature and Humidity Testing Works
| Test Dimension |
How It Works |
Representative Condition |
What the Test Can Reveal |
| Temperature control |
The chamber heats or cools the test space while sensors monitor temperature near the specimens. |
A product-specific set point, such as 40°C or 85°C; the permitted range depends on the chamber and test plan. |
Heat-related changes such as material softening, dimensional change, component drift, or cold-temperature brittleness. |
| Relative humidity control |
Moisture is added or removed to maintain a specified relative humidity (RH) at the test temperature. |
For example, 40°C and 93% RH is a commonly specified steady-state damp-heat condition in IEC 60068-2-78 testing. |
Moisture absorption, corrosion risk, insulation changes, swelling, or degradation of seals and coatings. |
| Combined temperature and humidity exposure |
The chamber holds temperature and RH together for a defined period, with the specimen monitored or periodically inspected. |
85°C and 85% RH is a widely used accelerated damp-heat condition in electronic-component qualification; duration is set by the applicable plan. |
Potential moisture- and heat-related weaknesses, including corrosion, leakage, or loss of electrical performance. Results do not automatically predict an exact service life. |
| Cyclic exposure |
Temperature and humidity are changed through repeated phases to expose specimens to changing environmental conditions. |
Temperature-humidity cycles may follow methods such as IEC 60068-2-30; the cycle severity and number of cycles depend on the selected test specification. |
Effects associated with repeated expansion and contraction, moisture uptake and release, and condensation-prone transitions. |
| Stabilization and dwell time |
The test begins or resumes its timed dwell after the specified conditions have stabilized, as defined by the procedure. |
Stabilization criteria and exposure duration are specified by the test plan; they are not universal chamber settings. |
More repeatable comparisons between specimens and clearer assessment of performance after a controlled exposure. |
| Monitoring and documentation |
Calibrated sensors record chamber conditions; product-specific sensors or functional checks can track specimen behavior. |
Record temperature, RH, exposure time, test interruptions, and any specimen measurements required by the procedure. |
Traceable evidence of test conditions and a basis for comparing pre-test and post-test performance. |
Important: Representative conditions are examples, not universal requirements. Select the test method, limits, tolerances, and duration for the product and applicable specification. Actual chamber performance and usable operating ranges vary by equipment and load.
Where Environmental Chambers Are Used
Temperature and humidity chambers are used wherever products must perform through changing environmental conditions.
In electronics, engineers expose circuit boards, sensors, and battery components to controlled heat, cold, and moisture. They watch for condensation, unstable readings, or materials that warp after repeated cycles.
Small details matter.
A poorly placed sensor can make results misleading.
Automotive suppliers use chambers to evaluate dashboard parts, connectors, seals, and coatings before road testing. In pharmaceutical packaging and medical-device development, controlled exposure can reveal whether packaging protects its contents during storage. Materials labs also test plastics, adhesives, textiles, and building components for dimensional changes or surface damage. Test plans should reflect real use: a product stored in a warehouse faces different conditions from one used outdoors. Still, no chamber perfectly recreates every environment. Teams need to document sensor locations, ramp rates, and sample preparation, then question results that seem too neat.
That extra review can be easy to skip. It shouldn’t be.
What Benefits These Chambers Provide
A temperature and humidity chamber gives teams a controlled way to expose materials, components, and finished products to changing environmental conditions. That control can reveal issues ordinary room testing may miss. A seal may tighten after a cold cycle. A label may lift in damp air. Small clues matter. By repeating defined temperature and moisture profiles, engineers can compare samples more fairly and trace changes to specific conditions. This supports product development, quality checks, and evidence-based design decisions.
Results are most useful when teams record ramp rates, dwell times, sensor locations, and sample preparation. Tiny setup differences can shift readings. Worth checking.
Chambers also help assess storage and transport risks before products reach customers. For example, teams can expose a packaged electronic assembly to warm, humid conditions, then inspect it for corrosion, condensation, or unstable operation. This can expose weak points early. Some materials respond slowly, so a short test may miss the real pattern. Chamber data should guide decisions, not replace field experience or sound engineering judgment. A chamber can make testing orderly, not automatically meaningful. Even well-run tests have limits. Teams may need to refine a test profile when real-world failures do not match lab results.
How to Choose a Chamber for Your Testing Needs
Choosing a temperature and humidity chamber starts with the test, not the largest advertised range. List the temperatures and humidity levels your procedure actually requires. Include dwell times, transition rates, and the number of cycles. A chamber that reaches a setpoint may still struggle to hold it under a full load.
Check usable interior space with your real samples, fixtures, and cable routing in place. Airflow can change when shelves are crowded or bulky items block circulation. Ask for temperature and humidity uniformity data across the working area, plus recovery time after the door opens. Small details matter. A few minutes of recovery may affect a short test.
Review the chamber’s control accuracy, sensor calibration options, data logging, and alarm functions. Match these features to your documentation needs and test standards. Confirm that the expected sample load fits within the chamber’s operating limits. Also consider installation space, power supply, water requirements, and routine maintenance. A specification sheet can look convincing, yet omit conditions close to your actual test. Ask how performance was measured, and whether the stated results reflect a loaded chamber. That question is easy to overlook.
Why Choose a Temperature and Humidity Chamber?
Match the chamber to the temperatures and humidity levels your product must withstand. These representative damp-heat test points show why both temperature range and humidity control matter.
Reference points include IEC 60068-2-78 steady damp heat at 40°C and 93% RH, an upper phase of 55°C and 93% RH for cyclic damp heat testing, and the commonly used 85°C/85% RH accelerated humidity condition. Verify the applicable standard, edition, and test procedure for your product.