How to Choose the Right Test Chamber for Your Needs?
Choosing the right test chamber begins with a clear understanding of your product, test method, and working environment. A chamber for a small sensor differs greatly from one for an automotive battery, medical device, or aerospace assembly. Temperature range matters. Humidity control matters. So does the sample’s size, heat output, and loading pattern.
Dr. Wayne Nelson, a recognized reliability-engineering authority, once stated, “Accelerated testing is useful only when the acceleration represents real life.” This principle remains important when selecting a test chamber. A dramatic temperature change may look efficient, but it can produce unrealistic stress. A stable chamber with precise sensors may offer more trustworthy results. That difference can affect product decisions, warranty planning, and customer safety.
Start by defining the actual test conditions. Record the required temperature, humidity, ramp rate, exposure time, and recovery period. Check the internal workspace carefully. A chamber may appear large, yet fixtures and airflow space reduce usable capacity. Consider the product’s heat generation too. A loaded chamber behaves differently from an empty one.
Energy use and maintenance deserve attention. A low purchase price can become expensive after years of calibration, repairs, and downtime. Ask about sensor accuracy, uniformity mapping, controller usability, and service support. Standards such as IEC 60068 may guide the test method, but they do not choose the chamber for you.
There is no perfect selection. Some requirements remain uncertain. That is worth admitting. The best test chamber is the one that produces relevant, repeatable evidence for your specific product, not the one with the longest specification sheet.
Define the Testing Goals and Performance Requirements
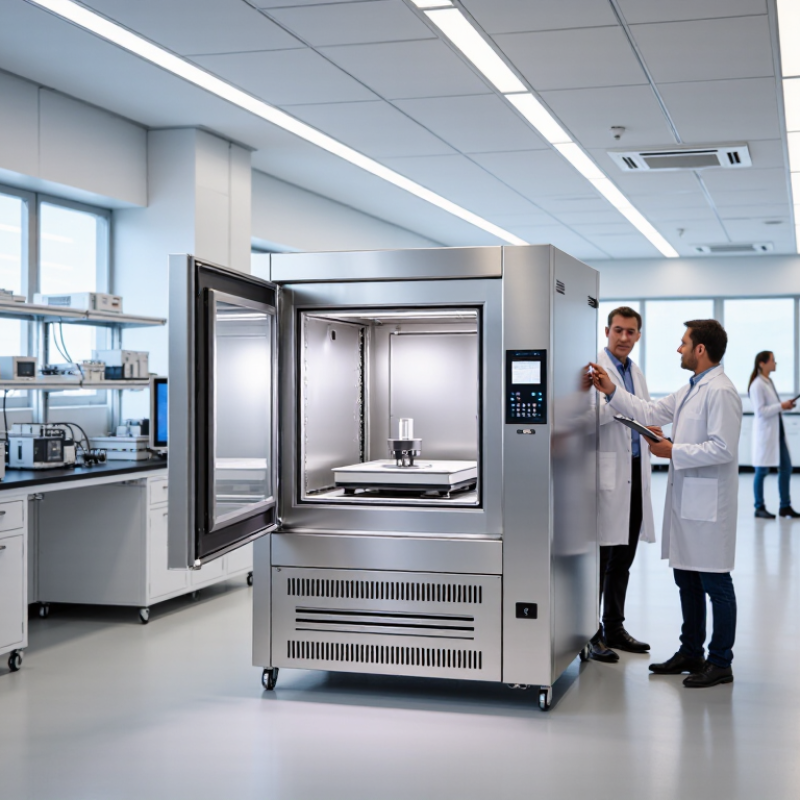
Before selecting a test chamber, define what the test must prove. A vague goal produces a vague chamber choice. State the product, failure risk, test duration, and environmental conditions. For example, a battery enclosure may need temperature cycling, humidity exposure, and rapid transitions. A material study may need only stable heat and precise monitoring. The difference changes the chamber design.
Translate goals into measurable performance requirements. Specify temperature range, ramp rate, humidity range, uniformity, stability, and usable volume. Include sample mass and fixture geometry. These details affect recovery time and airflow. If vibration, light, pressure, or corrosive atmosphere matters, record it early. Do not copy a previous specification without checking the current product. I have seen oversized chambers waste energy while undersized units distort results. Bigger is not always better.
Review applicable test methods and acceptance criteria with qualified test personnel. The chamber should support calibrated sensors, data logging, alarms, and safe test interruption. Ask how often verification will occur, and who will review the records. A requirement for ±2°C means little if sensor placement is poor. Allow room for future fixtures, but avoid paying for capabilities you will never use. That balance is difficult. Our assumptions can be wrong. Recheck them against actual test samples before purchase.
Match Chamber Types to Environmental Simulation Needs
How to Choose the Right Test Chamber for Your Needs?
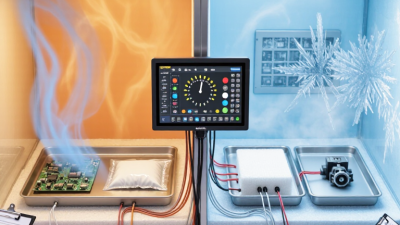
The right chamber should reproduce the environmental stress your product will face. A temperature and humidity chamber suits electronics, plastics, and sealed assemblies. It can expose condensation, heat, cold, and moisture-related failures. For sudden temperature changes, choose a thermal shock chamber. It moves samples between hot and cold zones quickly. A low-pressure chamber is better for altitude simulation and aerospace-related testing. Salt spray chambers support corrosion studies, but they cannot replace real outdoor exposure.
Match the chamber to measurable test requirements. Define temperature range, humidity limits, ramp rate, sample size, and test duration before comparing equipment. In practical laboratory work, poor airflow can create misleading results. Large samples may block circulation. Sensors should sit near critical surfaces, not only inside the chamber wall. Review calibration records and mapping data. A chamber may meet its advertised range, yet perform unevenly under load. That distinction matters.
Tips: Write a simple test profile first. Include start conditions, transitions, dwell times, and failure criteria. Check whether the chamber can support your fixtures and power connections. Ask for uniformity data at your actual operating conditions. Leave safety margins for future testing. A perfect match is rare. I have sometimes selected a smaller chamber for better control, then regretted the limited capacity later. Recheck your assumptions before purchase.
Evaluate Temperature, Humidity, and Other Control Specifications
Choosing a test chamber starts with the environmental profile, not the chamber’s exterior size. Define the required temperature range, humidity range, change rate, exposure time, and load condition. Start with the profile. A chamber rated from -70°C to 180°C may be unnecessary for a product tested between 10°C and 60°C.
Humidity changes everything. Confirm whether you need controlled relative humidity, condensation testing, or only dry heat. Relative humidity depends on temperature, so a small temperature shift can alter moisture conditions significantly. Ask for humidity stability, uniformity, and recovery data, not only the advertised range. Place sensors near the product zone. Sensor placement can change the result.
Consider chamber volume carefully. The test load should not block airflow or touch the walls. Include fixtures, cables, packaging, and heat-producing samples in your calculation. A crowded chamber may meet its specifications when empty but perform differently during testing. That detail is easy to overlook.
Control quality also depends on ramp rates, door openings, and recovery time. If your procedure requires rapid transitions, verify performance under a realistic load. Review calibration records and traceability to recognized standards. Independent temperature and humidity mapping can reveal cold corners or unstable areas. I have seen teams select a chamber by range alone, then discover that humidity recovery was too slow. That choice was technically defensible, but operationally weak. Build a test profile from actual use conditions, and leave room for measurement uncertainty.
Compare Chamber Size, Materials, Safety, and Operational Features
Choosing the right test chamber starts with the specimen, not the catalog. I have learned that a larger chamber is not always better. Measure the complete load, including fixtures, cables, and circulation space. Leave enough clearance around each item. A crowded chamber creates cold spots. An oversized chamber can increase energy use and slow recovery.
Chamber materials should match the testing environment. Stainless steel resists corrosion and supports easier cleaning. Coated interiors may suit mild conditions, but damaged coatings can hide contamination or rust. Check seals, shelves, cable ports, and drainage points before purchase. I once focused on temperature range and overlooked shelf loading. That mistake complicated daily testing. Ask for uniformity data under realistic loading, not empty-chamber conditions. Humidity systems also need suitable water controls and accessible drains.
Safety features deserve practical attention. Independent over-temperature protection, door interlocks, alarms, and emergency shutdowns reduce avoidable risks. Choose ventilation connections when the process requires controlled exhaust. Operational features affect every test day. Useful options include data logging, programmable profiles, remote notifications, calibration access, and easy-to-clean surfaces. A beautiful interface is not enough. Confirm that operators can understand alarms quickly. I still question whether every advanced feature earns its maintenance cost. Sometimes, a simpler chamber provides more dependable results.
How to Choose the Right Test Chamber for Your Needs? - Compare Chamber Size, Materials, Safety, and Operational Features
| Chamber Type | Typical Working Volume | Typical Temperature Range | Humidity Capability | Interior Materials | Safety Features | Operational Features | Best Suited For |
|---|---|---|---|---|---|---|---|
| Benchtop Temperature Chamber | Approximately 20–150 L | About −40°C to +150°C | Usually temperature only; humidity may not be available | Corrosion-resistant stainless steel; insulated double-wall construction | Over-temperature cutout, door interlock or alarm, circuit protection | Compact footprint, programmable controller, data logging through USB or Ethernet on many models | Small components, materials screening, laboratory research, and limited-space installations |
| Benchtop Temperature and Humidity Chamber | Approximately 30–200 L | About −20°C to +150°C, depending on configuration | Commonly 10–95% RH within a restricted temperature range | Stainless-steel working space with sealed joints and insulated walls | High/low limit alarms, water-level protection, over-temperature protection, door alarm | Humidity control, programmable ramps and dwells, trend display, alarm history | Electronic assemblies, packaging, coatings, biological materials, and accelerated aging studies |
| Reach-In Temperature and Humidity Chamber | Approximately 300–2,000 L | Commonly −40°C to +150°C; some configurations offer wider ranges | Typically 10–95% RH over a defined temperature range | Austenitic stainless-steel interior, insulated outer cabinet, removable shelves | Independent temperature limiter, emergency stop, door release, refrigerant and electrical protection | Multiple shelves, viewing window, interior lighting, programmable profiles, remote monitoring options | Large products, batch testing, qualification programs, reliability testing, and production support |
| Walk-In Environmental Chamber | Approximately 5–100 m³ or larger | Often about −40°C to +80°C; range depends on size and cooling design | Commonly 20–95% RH within the usable temperature range | Stainless-steel or coated interior panels, insulated modular wall system, sealed floor | Interior emergency release, personnel alarm, over-temperature cutout, non-slip floor, safety lighting | Walk-in access, reinforced floor, product fixtures, test monitoring, programmable control, service access | Vehicles, battery systems, large assemblies, industrial equipment, and full-scale product testing |
| Thermal Shock Chamber | Approximately 50–1,000 L | High zone often around +60°C to +200°C; low zone may reach approximately −65°C | Generally not designed for controlled relative humidity | Stainless-steel baskets and chambers; high-temperature insulation and sealed construction | Over-temperature protection, basket-position interlock, door lock, refrigerant and compressor safeguards | Two-zone or three-zone transfer, automatic cycling, dwell-time control, cycle counting, test reports | Rapid transitions, solder-joint reliability, material expansion mismatch, and electronic component qualification |
| Salt Spray / Corrosion Chamber | Approximately 100–2,000 L | Usually near ambient test temperatures, commonly around +35°C for salt spray testing | Controls spray rate, solution concentration, and chamber temperature rather than conventional RH | Non-metallic corrosion-resistant lining, reinforced cover, corrosion-resistant fittings | Chemical-resistant drain system, low-solution alarm, lid support, exhaust and spill-control provisions | Programmable spray cycles, atomizing nozzle adjustment, solution reservoir, collection funnel, timer | Coatings, plated parts, fasteners, painted surfaces, and corrosion-resistance comparisons |
| Altitude / Low-Pressure Chamber | Approximately 100–2,000 L | Often about −60°C to +100°C when combined with temperature control | Humidity control may be limited or unavailable under low pressure | Sealed stainless-steel vessel, reinforced door, pressure-rated viewing window | Pressure relief, vacuum protection, door interlock, leak monitoring, emergency venting | Altitude simulation, controlled pressure profiles, temperature cycling, pressure recording | Aerospace equipment, avionics, packaging, sealed products, and low-pressure performance testing |
Assess Compliance, Maintenance, Energy Use, and Total Cost
How to Choose the Right Test Chamber for Your Needs?
Compliance should guide the purchase, not appear after installation. A chamber must match the required IEC 60068, ASTM, or sector-specific test method. It should also provide uniformity, stability, recovery time, and traceable calibration under real loads. ISO/IEC 17025 emphasizes competent testing and reliable measurement results. A chamber reaching -40°C is not automatically compliant.
Maintenance strongly affects usable capacity. Inspect door seals, filters, sensors, heaters, and refrigeration components before signing a purchase order. The U.S. Department of Energy’s Operations & Maintenance Best Practices Guide estimates that effective maintenance can reduce energy use by 5–20%. That figure is useful, but not universal. A dusty filter, frequent door opening, or poor room ventilation can erase those savings. Small details matter.
Energy data should come from your actual test profile, not the nameplate rating. Request power consumption during ramping, soaking, recovery, and standby. Include heat released into the facility, water use, calibration, replacement parts, and technician time. A lower purchase price may hide expensive downtime. My own selection mistake would be trusting a neat spreadsheet too quickly. No spreadsheet captures every failure. Compare total cost over five to ten years, then challenge the assumptions with measured operating data. Sources: U.S. Department of Energy, Operations & Maintenance Best Practices Guide; ISO/IEC 17025:2017; IEC 60068 series.
Related Posts
-
Why is a Test Chamber Essential for Quality Control in Product Development
-
What Is a Thermal Test Chamber?
-
Top Temperature Humidity Chambers for Global Buyers?
-
Choosing the Right Temperature Humidity Chamber: A Comprehensive Comparison Guide
-
2026 Best Thermal Test Chamber Buying Guide
-
What Is an Environmental Chamber Used For?
Have Questions? We're Here to Help!
Give us a call at (864) 989-0566 or send us a message to discuss our testing equipment with an expert.