7 Tips for Choosing the Right Robo Safety Fence?
Choosing the right Robo Safety Fence is not simply a matter of measuring the robot’s footprint. It requires a practical understanding of motion, access, maintenance, and human behavior. A fence may look strong in a showroom, yet fail when a technician reaches through an unplanned gap. Small details matter. Door swing, panel height, mesh openings, visibility, and floor anchoring can affect daily safety.
Jeff Burnstein, president of the Association for Advancing Automation, has emphasized, “Safety is not an option; it is a requirement.” That principle gives this guide its foundation. The seven tips ahead examine how to match a Robo Safety Fence with robot reach, stopping distance, safeguarding devices, workflow, and future expansion. They also consider whether operators can clearly see the cell before entering it. A reliable design should support safe work without creating unnecessary delays.
Real installations are rarely perfect. A fence can be technically compliant but awkward to clean around. A gate can protect access yet slow down routine inspection. These weaknesses deserve honest review. The best choice balances protection, visibility, durability, and practical maintenance. It should also work with emergency stops, interlocks, light curtains, and the risk assessment for the complete robotic cell. One overlooked measurement can change the result. This guide helps manufacturers, integrators, and facility managers ask better questions before purchasing, installing, or expanding a Robo Safety Fence. Safety starts with evidence, not appearance.
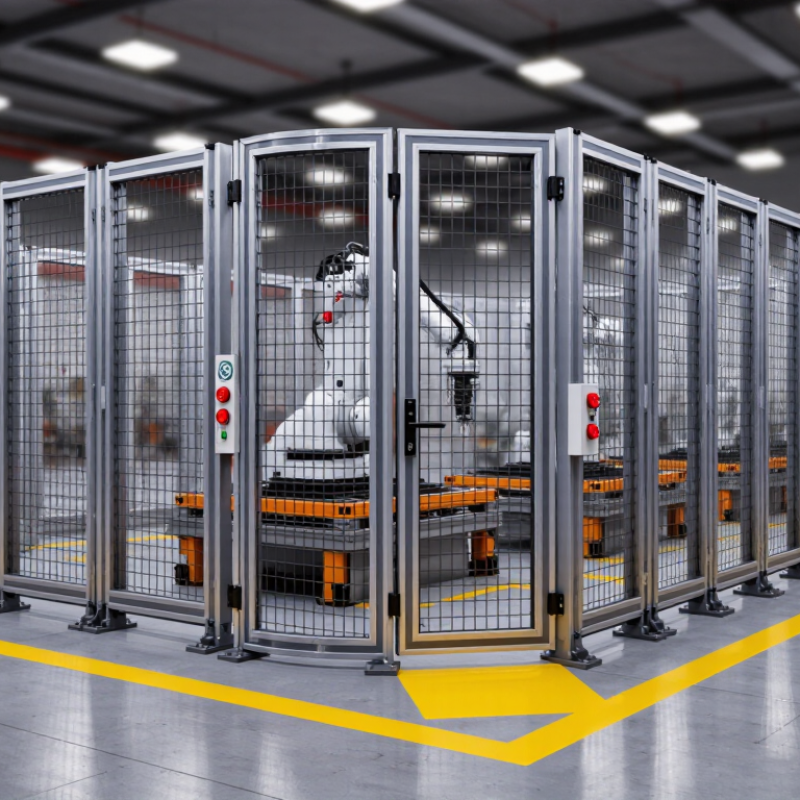
Define Robo Safety Fence Scope Using ISO 12100 Risk Assessment Principles
7 Tips for Choosing the Right Robo Safety Fence?
A robo safety fence should begin with an ISO 12100 risk assessment, not a catalog dimension. Define the robot cell’s intended use, materials, tools, operators, and maintenance tasks. Then identify hazards throughout each operating phase. Consider crushing points, unexpected movement, flying fragments, sharp tooling, and stored energy. The fence must cover the robot’s full reach, including unusual arm positions and attached equipment. Small gaps can create serious access risks.
Tip: Map the danger zone before selecting fence height or panel spacing. Mark the robot envelope on the floor, then add stopping distance and safe separation. Include areas behind the cell that operators may overlook. A gate should not become the easiest route into danger. Interlocked access points may be needed, but their design should follow the completed risk assessment.
Tip: Assess foreseeable misuse, not only ideal operation. Workers may reach through openings, bypass procedures, or enter during setup. These actions require practical safeguards and clear controls. Also review cleaning, inspection, and fault recovery. A fence that works during production may fail during maintenance. That is often missed.
Choose materials that resist the workplace environment, including impact, heat, dust, and corrosion. Check visibility, because blocked sightlines can encourage unsafe entry. Document each hazard, selected protective measure, and remaining risk. The process may reveal weak assumptions. That is useful. Risk assessment is not a one-time form; changes to layout, tooling, or workflow should trigger a fresh review.
Set Guard Height and Opening Sizes Against ISO 13857 Reach-Distance Data
7 Tips for Choosing the Right Robo Safety Fence?
Set Guard Height and Opening Sizes Against ISO 13857 Reach-Distance Data
Robot cells are becoming denser. The International Federation of Robotics reported 541,302 industrial robots installed worldwide in 2023. More robots mean more moving points, stored energy, and possible access paths.
Guard height should follow the hazard zone, not a convenient standard size. ISO 13857:2019 provides safety distances for preventing upper and lower limbs from reaching dangerous areas. It considers reach direction, body parts, and the relationship between guard height and hazard distance. A taller fence may still fail if an operator can reach over it. Measure the nearest moving component, including tooling and payload swing.
Opening size matters just as much. ISO 13857 tables address reaching through openings, but the shape and location of each opening affect the result. A small mesh gap near a rotating joint may still invite finger access. Use the applicable table, then verify the actual panel, frame, and mounting tolerances. Do not copy a number from a catalog blindly.
BLS recorded 5,283 fatal occupational injuries in the United States during 2023. That figure does not identify guarding failures, but it reinforces the need for disciplined risk control. During installation, use a reach-distance gauge and inspect doors, corners, cable gaps, and floor clearances. Real cells are rarely perfect. A rushed measurement can create a serious weakness. Consult a qualified safety professional when the hazard distance remains uncertain.
Verify Strength, Visibility, and Impact Performance Under ISO 14120 Requirements
Choosing the right robo safety fence starts with evidence, not appearance. Under ISO 14120 requirements, inspect the frame, panels, posts, fasteners, and connection points as one protective system. A thick panel can still fail if its anchors loosen during repeated impacts. Ask for documented strength tests and impact performance data, not vague claims. The test setup should reflect real hazards, including tool movement, falling parts, and accidental contact.
Visibility matters too. Operators need to see the robot cell without opening the guard. Clear panels or suitable mesh can improve monitoring, but openings must not allow hands or tools to reach dangerous zones. Check every gap against the machinery risk assessment and applicable safety distances. Poor visibility often encourages workers to bypass a guard. That is a practical failure, even when the fence looks compliant.
Inspect the fence on site.
Look for sharp edges, distortion, loose bolts, and damaged coatings. A useful review also considers cleaning, access, maintenance, and emergency escape needs. In my experience, teams sometimes focus too heavily on impact resistance and overlook daily usability. That choice deserves reconsideration. ISO 14120 supports safe guard design, but it does not replace a complete risk assessment or evidence from relevant machine tests. Keep inspection records, test reports, and installation details together. Reliable documentation makes future checks faster and exposes weak assumptions before production begins.
Validate Installation, Inspection, and Training Against OSHA 1910.212 Duties
Choosing a robo safety fence starts with the hazard, not the fence panel. OSHA 1910.212 requires protection from point-of-operation hazards, rotating parts, flying chips, and sparks. Map the robot’s full reach, including the tool, payload, and unexpected swing. Measure twice. A fence that looks secure may still leave a hand-sized gap near a transfer station.
Check installation details carefully. Panels should remain stable during normal contact, while gates should control access to hazardous areas. Review openings, anchor points, gate alignment, and visibility from the operator position. Interlocked access doors can help stop motion before entry, but they require proper integration and testing. Do not assume the first test proves enough. I have seen teams test an empty cell, then overlook a larger fixture that changed the hazard zone.
Inspection must continue after commissioning. Look for loose fasteners, bent mesh, damaged hinges, defeated switches, and new gaps after maintenance. Record findings with dates and corrective actions. Training should explain why the barrier exists, how to enter safely, and what to do when a fault appears. Operators, maintenance workers, and supervisors need different practical instructions. Short demonstrations work better than paperwork alone. OSHA compliance is not a decorative certificate; it is a daily duty supported by installation quality, inspection discipline, and informed behavior. Some procedures may seem obvious, yet that assumption deserves review.
OSHA 1910.212 Machine-Guarding Coverage
A properly selected robotic safety fence should prevent employee exposure to the machine hazards identified in OSHA 29 CFR 1910.212(a)(1). The standard specifically identifies four hazard categories that require effective guarding: point of operation, ingoing nip points, rotating parts, and flying chips or sparks.
Use this checklist when validating fence installation and inspection. Employee training should also explain the guarded hazards, safe access procedures, and the limits of the safeguarding system. OSHA 1910.212 establishes the guarding duty; additional OSHA standards and site procedures may address inspection and training requirements.