How to Choose Coloured Cable Sleeving for Any Project?
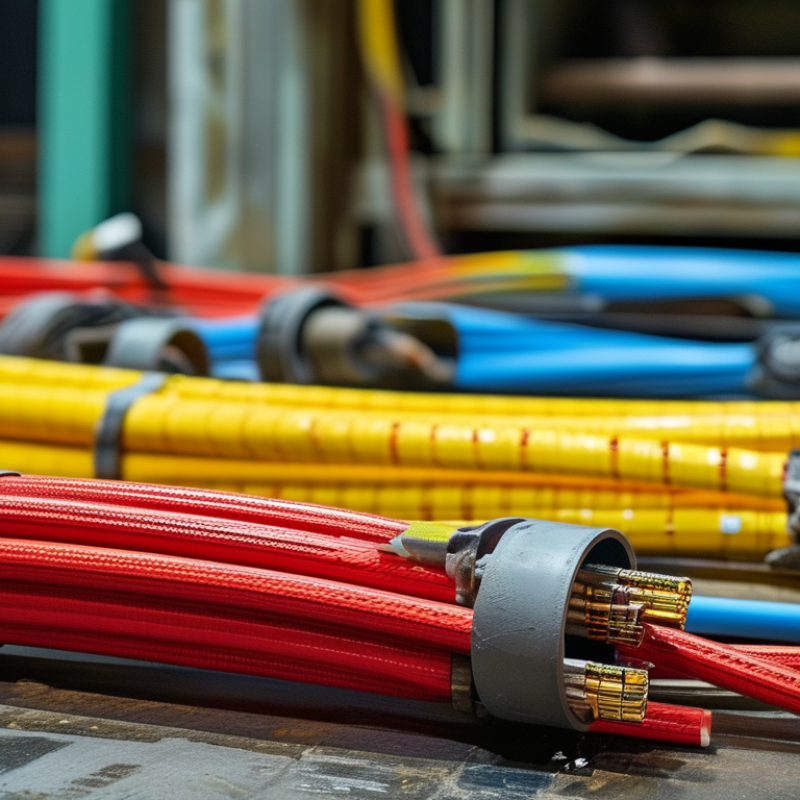
Choosing Coloured Cable Sleeving is rarely just a matter of picking an attractive shade. The right sleeve must suit the cable, installation environment, and expected movement. A bright red sleeve may identify power wiring, while blue can separate control circuits from signal lines. That visual clarity matters inside crowded cabinets, workshop benches, and stage equipment.
Cable-assembly specialist Daniel Mercer offers a useful reminder: “Good sleeving protects the cable and explains its purpose at the same time.” This principle guides practical selection. Measure the cable bundle carefully, including connectors and bends. A sleeve that fits too tightly may split during installation. One that is too loose may slide, snag, or look unfinished. Small details matter.
Consider braided polyester for flexible, general-purpose protection. Choose PET or nylon when abrasion resistance is important. For higher temperatures, heat-resistant materials deserve closer attention. Outdoor projects may also require protection from sunlight, moisture, and dirt. Closure style changes the installation experience. Expandable sleeving works well around irregular bundles, while split sleeving can simplify retrofits.
Colour alone is not enough. Labels, routing plans, and inspection checks still matter. Even experienced installers occasionally choose a sleeve by appearance first. That is a useful mistake to question. Test a short section before covering the entire cable run. Feel the flexibility. Check the fit. Look for fraying.
This guide explains how to compare materials, sizes, colours, and installation methods. It also considers practical compromises, because every project has limits. The best choice is not always the brightest or cheapest option. It is the sleeve that remains clear, durable, and suitable after real use.
Understanding Coloured Cable Sleeving and Its Main Functions
How to Choose Coloured Cable Sleeving for Any Project?
Understanding Coloured Cable Sleeving and Its Main Functions
Coloured cable sleeving is more than a visual finishing layer. It groups wires, reduces abrasion, and makes maintenance faster. In a crowded control cabinet, a red sleeve can identify power conductors, while blue can separate signal circuits. Colour coding does not replace labels, though. That shortcut can create confusion later.
The global wire and cable market was valued at about USD 216.65 billion in 2022 , according to Grand View Research. This growth reflects wider demand for organized, protected wiring in vehicles, buildings, and industrial equipment. Sleeving helps cables resist rubbing against metal edges, dust, and repeated movement. Expandable PET sleeving suits flexible harnesses. Heat-shrink polyolefin gives tighter protection around terminals. Fiberglass sleeving with silicone coating is better for high-temperature areas, but its rating depends on construction and testing.
Choose the material by temperature, flexibility, chemical exposure, and installation space. Typical PET sleeving may tolerate temperatures near 150°C , while silicone-coated fiberglass products can approach 200°C . These figures are not universal. Always verify the technical datasheet and relevant test standards.
I have found that bright colours improve fault tracing, but they can fade near heat or sunlight. That weakness is easy to overlook. Leave enough expansion room, and inspect the finished sleeve for sharp edges, loose ends, and hidden compression. A tidy harness is useful, but a tidy mistake is still a mistake.
Assessing Cable Size, Material, and Environmental Requirements
How to Choose Coloured Cable Sleeving for Any Project?
Cable size should guide the selection before colour or appearance. Measure the cable bundle, including connectors and bends. Measure twice. Choose sleeving with enough expansion for installation, but avoid excessive looseness. A loose sleeve can snag on brackets and create unwanted movement. A tight sleeve may split when pulled over a wide connector.
Material must match the working environment. PET braided sleeving suits many indoor assemblies because it offers flexibility, abrasion resistance, and simple cutting. Polyolefin heat-shrink sleeving provides a tighter finish around individual cables. Fibreglass sleeving can tolerate higher temperatures, but it may feel rough during handling. Heat matters. Check the rated temperature range, flame behaviour, and electrical insulation data before purchase. I once selected flexible sleeving for a warm enclosure and underestimated continuous heat. The colour stayed attractive, but the material became less stable near the power connection.
Moisture, oil, sunlight, chemicals, and movement can change the decision. Outdoor cables may need UV-resistant material, while workshop equipment may require stronger abrasion and chemical resistance. In vehicles, choose sleeving that tolerates vibration and repeated bending. Coloured options can support identification, but colour coding should remain consistent across the installation. Confirm the product’s test reports and installation guidance from reliable technical sources. Local electrical requirements may also affect acceptable materials. A practical trial on a short cable section often reveals problems that measurements miss. It is not a perfect method, but it can prevent expensive rework.
Choosing Colours for Identification, Safety, and Visual Design
How to Choose Coloured Cable Sleeving for Any Project?
Choosing Colours for Identification, Safety, and Visual Design
Coloured cable sleeving can make a project easier to inspect, repair, and understand. In my experience, colour works best when it supports clear labels rather than replacing them. Choose one colour for power, another for signals, and a third for communication lines. Keep the system simple. A crowded colour scheme quickly becomes confusing inside a busy control panel.
Safety needs careful thought. Bright yellow or orange sleeving can improve visibility around machinery, but colour meanings vary between workplaces and regions. Check the project’s established safety practices before installation. Never assume a colour has one universal meaning.
Consider the environment too. Dark sleeving hides dust, while light colours reveal damage sooner. Heat, oil, sunlight, and repeated movement can also change the appearance over time.
Tips: Write the colour system on a nearby wiring schedule. Use matching labels at both cable ends. Test a small sleeve section under actual lighting first. I once chose a shade that looked clear indoors but disappeared beside grey equipment. That mistake was avoidable. Visual design still matters, especially in exposed installations, but neat routing and consistent spacing usually create more impact than decorative colour choices. Leave enough contrast between adjacent cables. Inspect the result after fitting, because a sleeve can twist and hide its intended colour.
Comparing Sleeving Types, Durability, and Installation Methods
How to Choose Coloured Cable Sleeving for Any Project?
Comparing sleeving types, durability, and installation methods starts with the working environment.
Expandable braided sleeving suits cable bundles that need flexibility and airflow. It slides over connectors and expands around irregular shapes.
PET sleeving resists abrasion and handles moderate heat. Heat-shrink sleeving creates a tighter seal, but it needs controlled heating and accurate sizing. Split-loom tubing installs quickly around existing cables. However, it looks less refined and may open under repeated movement.
Durability depends on more than material. Check temperature range, chemical exposure, moisture, and friction points.
In workshops, bright colours can make cable identification faster. In equipment cabinets, colour coding reduces tracing errors during maintenance.
A practical test is simple: bend, pull, and rub a sample against the installation surface. Watch for fraying.
I once selected a sleeve mainly for its colour. That choice was not perfect. It faded near a warm power supply and became brittle after several months.
Installation quality also affects service life.
Measure the bundle diameter before cutting, then allow extra length near bends. For braided sleeving, melt the cut edge carefully to limit fraying. Do not overheat it.
For heat-shrink products, use steady heat and rotate the cable slowly.
A loose fit can slide. An oversized sleeve can bunch and trap dust.
Secure long runs with compatible clips, leaving enough movement at connectors. Recheck the finished cable after vibration testing, because a neat first installation can still hide pressure points.
Installing and Maintaining Coloured Cable Sleeving Correctly
How to Choose Coloured Cable Sleeving for Any Project?
Installing and Maintaining Coloured Cable Sleeving Correctly
Choose sleeving by temperature, abrasion, flexibility, and chemical exposure, not colour alone. Coloured sleeves can identify circuits quickly, especially inside crowded control panels. However, colour coding must match the project drawing and site procedure. A wrong colour can mislead maintenance workers.
Before installation, measure the cable bundle at its widest point. Select sleeving that slides over connectors without excessive stretching. Cut the sleeve with a clean, hot knife or sealed cutting tool. This reduces fraying. Do not force it around sharp bends. Leave enough length for movement and inspection. Keep the sleeve away from hot surfaces unless its temperature rating supports them. IPC/WHMA-A-620 provides widely used workmanship guidance for cable and wire harness assemblies, including routing and mechanical support.
Secure the sleeve with compatible bands or heat-shrink sections. Avoid crushing the cable beneath tight ties. Inspect both ends after installation. Look for exposed conductors, loose fibres, darkened areas, or flattened sections. NFPA’s Home Fires Involving Electrical Distribution and Lighting Equipment report recorded an annual average of about 32,620 fires in the United States during 2015–2019. Poor cable protection is not the only cause, but it deserves attention. Maintenance records should include inspection dates and observed damage. A sleeve may look acceptable while hiding abrasion underneath. I have seen this assumption delay repairs. Recheck it. Replace damaged sleeving instead of covering it with another layer. During cleaning, use only a method approved for the sleeve material; aggressive solvents can weaken its surface quietly.
Article Source:
Have Questions? We're Here to Help!
Give us a call at (864) 989-0566 or send us a message to discuss our testing equipment with an expert.